
Sunday, February 23, 2014
Crocheted Flower Potholders
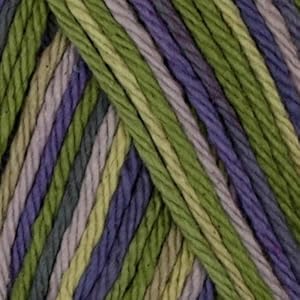
I thought I would rekindle my love of yarn by sharing one of my favorite patterns: Fanciful Flower Potholders. This is a relatively easy project and it is a nice, portable size so you can bring it with you and work just about anywhere. Also, it looks insanely awesome and attracts plenty of oooh's and aaah's from lookers-on. To simplify this pattern further, I like to work with just one variegated Lily Sugar'n Cream yarn for the petals. Butter Cream and Countryside Ombre are two of my favorite options. These potholders make great gifts and you can customize them to match any kitchen. Here is the finished product!


Friday, February 21, 2014
How to Start a Book Club
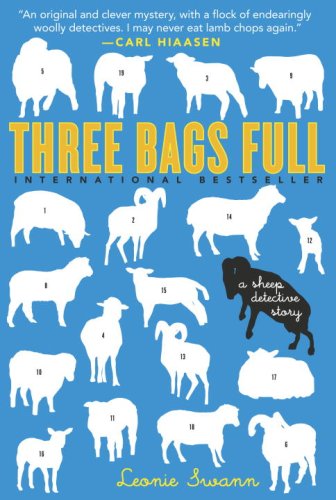
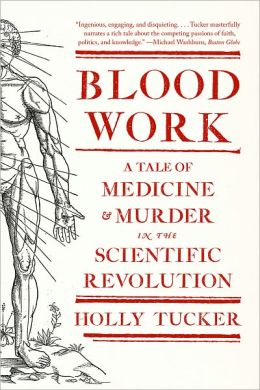
So you want to start a book club... that's great! Do it. : ) Book clubs are a fabulous way to expand your reading list while trying new genres or authors. Also, there is a great opportunity to socialize and share your thoughts with other readers. This summer my mom and I both started different book clubs, so I thought I would write a post to encourage other bibliophiles who have been considering forming a group of their own.

1. Accept responsibility.
The first thing you need to do is realize that you are essential to making your group happen. Step up and take charge. Email your friends or spread the word among new acquaintances.
2. Decide on the style of your club.
My mother opted for the more traditional format where group members pick one book they will all read before the next meeting. This makes for easy and thorough discussion since members respond to one another's comments and delve deeper into plot or characters. With this setup you can also pick a theme to guide your selection (best sellers, award-winners, books by female authors, mystery, etc.), so consider your options and pitch them to the group. Be receptive to feedback and find out what will work well for your readers.
I chose to do something a little different with my club; we select a genre for each month and individuals pick their own book to read that falls within the chosen category. The goal with this kind of club is to encourage exploration of different types of books. If you read contemporary fiction exclusively and are unsure how to branch out, within this format you can sample a historical text, travel memoir, and
 classic work of literature while building a reading list as you go. Meetings for this format are more like informal book reports with a question and answer session from the audience. If you want to research and discuss the genre you have selected, that is a great way to open one of these discussions and find a common link between the different titles.
3. Figure out logistics. When and where will you meet? How often? Will there be snacks? All of these details can be worked out at an interest meeting along with the first book selection (or few). Decide how you want to communicate about upcoming events and share information. Email lists or Facebook groups work well, but you should discuss with everyone to ensure important posts are seen in a timely
manner.
4. Start reading your new book! It is really that easy to get started. As you meet you will get a feel for the group and realize any additional details that need to be considered. Have fun!
Sarah
1. Accept responsibility.
The first thing you need to do is realize that you are essential to making your group happen. Step up and take charge. Email your friends or spread the word among new acquaintances.
2. Decide on the style of your club.
My mother opted for the more traditional format where group members pick one book they will all read before the next meeting. This makes for easy and thorough discussion since members respond to one another's comments and delve deeper into plot or characters. With this setup you can also pick a theme to guide your selection (best sellers, award-winners, books by female authors, mystery, etc.), so consider your options and pitch them to the group. Be receptive to feedback and find out what will work well for your readers.
I chose to do something a little different with my club; we select a genre for each month and individuals pick their own book to read that falls within the chosen category. The goal with this kind of club is to encourage exploration of different types of books. If you read contemporary fiction exclusively and are unsure how to branch out, within this format you can sample a historical text, travel memoir, and
classic work of literature while building a reading list as you go. Meetings for this format are more like informal book reports with a question and answer session from the audience. If you want to research and discuss the genre you have selected, that is a great way to open one of these discussions and find a common link between the different titles.3. Figure out logistics. When and where will you meet? How often? Will there be snacks? All of these details can be worked out at an interest meeting along with the first book selection (or few). Decide how you want to communicate about upcoming events and share information. Email lists or Facebook groups work well, but you should discuss with everyone to ensure important posts are seen in a timely
manner.
4. Start reading your new book! It is really that easy to get started. As you meet you will get a feel for the group and realize any additional details that need to be considered. Have fun!
Sarah
Friday, February 14, 2014
Fun Ideas for Valentine's Day (or any day)
This is our first Valentine's Day together, married or otherwise. Between my past work schedule, his study schedule, living apart for a year, etc. we never seem to be in the same place at the right time to celebrate a holiday. We spent our first Christmas together in Germany for our honeymoon followed by New Year's Eve with the family in Alabama, so we are doing this one, too! This will be my year of holidays where I make up for lost time. Then I can go back to not caring quite so much. (Except for Christmas- it's my favorite!)


Here are some ideas for a fun night in:
1. Make a crossword puzzle or word search filled with clues from your relationship.
2. Class it up! Prepare fancy appetizers to munch on while you make dinner or dessert together. You can really dress up a Triscuit.
3. Journal. If there is a commemorative project that you have been putting off, spend time working on it together.
4. Quiz each other. Make your own questions for a DIY Newlyweds game. You can keep questions lighthearted or delve deeper to learn more about one another.
5. Make a mixed tape. Set the tone for your evening together. Is it a walk down memory lane or a night for dancing in the living room?
6. Enjoy craft time as a couple. Try to pick a project that you will both enjoy. I recommend the scrape off animal art for reluctant artists.
7. Watch a movie that is new to you. Here are some of my selections: Robot & Frank, Amelie, The Best Exotic Marigold Hotel, Im Juli, Before Sunrise, Death at a Funeral (2007), Cherish, It Happened One Night
8. Read a book together. Revisit a childhood favorite and take turns reading out loud.
Feel free to share any of your date night ideas below! We ended up stretching Valentine's Day out over several days. It was nice taking time to do things together and squeeze in some quality time before rotation number two kicks off! I hope you all enjoyed the holiday. If your evening didn't go as planned, schedule another. When you celebrate doesn't matter nearly as who you celebrate with.
Sarah
Here are some ideas for a fun night in:
1. Make a crossword puzzle or word search filled with clues from your relationship.
2. Class it up! Prepare fancy appetizers to munch on while you make dinner or dessert together. You can really dress up a Triscuit.
3. Journal. If there is a commemorative project that you have been putting off, spend time working on it together.
4. Quiz each other. Make your own questions for a DIY Newlyweds game. You can keep questions lighthearted or delve deeper to learn more about one another.
5. Make a mixed tape. Set the tone for your evening together. Is it a walk down memory lane or a night for dancing in the living room?
6. Enjoy craft time as a couple. Try to pick a project that you will both enjoy. I recommend the scrape off animal art for reluctant artists.
7. Watch a movie that is new to you. Here are some of my selections: Robot & Frank, Amelie, The Best Exotic Marigold Hotel, Im Juli, Before Sunrise, Death at a Funeral (2007), Cherish, It Happened One Night
8. Read a book together. Revisit a childhood favorite and take turns reading out loud.
Feel free to share any of your date night ideas below! We ended up stretching Valentine's Day out over several days. It was nice taking time to do things together and squeeze in some quality time before rotation number two kicks off! I hope you all enjoyed the holiday. If your evening didn't go as planned, schedule another. When you celebrate doesn't matter nearly as who you celebrate with.
Sarah
Wednesday, December 11, 2013
Crocheted Headband
Here is one of my homemade Christmas presents! This crocheted headband is simple enough for beginners (me) to make and can be altered for different stitches or yarns. I chose to half double crochet in a bright teal color that is a Simply Soft Caron yarn. I have been drooling over their yarns for weeks, and this project finally gave me an excuse to buy a skein. Plus, I still have tons of leftover yarn to use for future projects.

I decided that 5 stitches across was the width I wanted for my accessory. I made almost enough rows to complete the headband and then I cut a small piece of elastic and tied it to both ends of the band. I used hot glue to lay the ends flat. The flower was made from a package of felt pieces and a button. This was a free style project, but if you would like more specific measurements or details, please let me know!
*I think smaller elastic would have worked just as well, but I wanted to make sure this was extra secure. Also, no one will see those two inches that are not as attractive.

I decided that 5 stitches across was the width I wanted for my accessory. I made almost enough rows to complete the headband and then I cut a small piece of elastic and tied it to both ends of the band. I used hot glue to lay the ends flat. The flower was made from a package of felt pieces and a button. This was a free style project, but if you would like more specific measurements or details, please let me know!
 |
Sunday, December 8, 2013
Tri-Bead Candy Cane Ornaments
These festive candy canes add instant cheer to your holiday decor and couldn't be easier to make!
 You will need:
-red, white, and green tri-beads (look for these in the kid's crafting section)
-red, white, or green pipe cleaners
-scissors
 Directions:
1. Select your pipe cleaner and fold the tip of one end upwards so your beads don't fall off. Tweezers make this job even easier and allow you to leave the smallest amount of pipe cleaner exposed.
2. Start stringing beads onto the pipe cleaner. I thought alternating red and white or green and white looked the best, but feel free to play around with other combinations and colors.
3. When you have about 4 inches left without beads, gently bend the pipe cleaner to create your candy cane shape. This will help you determine how many more beads you want to add.
4. When you feel like you have the right amount of beads, snip off the unused end of your pipe cleaner. Save about half and inch to fold over and secure your project.

-red, white, and green tri-beads (look for these in the kid's crafting section)
-red, white, or green pipe cleaners
-scissors
1. Select your pipe cleaner and fold the tip of one end upwards so your beads don't fall off. Tweezers make this job even easier and allow you to leave the smallest amount of pipe cleaner exposed.
2. Start stringing beads onto the pipe cleaner. I thought alternating red and white or green and white looked the best, but feel free to play around with other combinations and colors.
3. When you have about 4 inches left without beads, gently bend the pipe cleaner to create your candy cane shape. This will help you determine how many more beads you want to add.
4. When you feel like you have the right amount of beads, snip off the unused end of your pipe cleaner. Save about half and inch to fold over and secure your project.
Wednesday, November 6, 2013
Infinity Scarf for Beginning Crochet

---------------------------------------------------------------
I know. I know. I haven't finished the last scarf, but I have learned an important lesson. Make that two.
1. Always buy 2 skeins of yarn if you have a scarf in mind. The beautiful variegated yarn I used for my scarf was purchased well over a year ago- before I even started crocheting. The colors jumped out at me and made me want to learn, so I took 1 skein of yarn home with me. When I finally started working on my project, I didn't even consider the possibility that my yarn might be out of stock. It had always been at the craft store which brings me to lesson number two.
2. If you don't buy enough yarn to finish your project, at least save the wrapper that came with the yarn. All the information you need to track it down is on that piece of paper. These wrappers can easily get lost or discarded over time because, frankly, they are annoying. It's like trying to keep up with your receipts: a fabulous idea until you find bits of paper everywhere you look and want to burn them all. Maybe that's just me...
I would suggest finding a way to stash all of your yarn wrappings in a safe and contained location. A decorative box or project binder might work well. Then, if an emergency yarn situation should occur, you could take to the internet with all the information you need to track your yarn to a hoarder on ravelry who might be willing to haggle with you. The search for my yarn will continue, but in the meantime, I am itching to start and finish a scarf.
This wonderfully informative video walks you through an infinity scarf project step by step. Plus, this pattern calls for super bulky yarn and a large look, so the whole project can be completed in just a few hours. Yes! I am using Wool-Ease Chunky yarn by Lion Brand Yarn in a gorgeous spice color.

Saturday, November 2, 2013
Fun Writing Aids
In the spirit of National Novel Writing Month, here are some fun ideas and websites that can aid you in your writing!
1. When you can't figure out just the right word for your sentence, type elephant (or another word that will stand out) and carry on. After completing your piece or reaching a good stopping point, you can search through your document and find each elephant and replace with a more appropriate word. I am excited to try this in my own writing. It will save time and allow me to use the best descriptors possible.
2. If you have a serious procrastination problem and need a new form of motivation, check out Write or Die. This worked surprisingly well for me. I wrote about 350 word in a little over 5 minutes. I felt the same urgency to write as I do the night before a paper is due because I didn't want any of my work to be deleted. If you enjoy editing, but have troubles writing something in the first place, this might be the perfect tool for you!
3. This site seems especially cool for kids who want to craft an interactive choose your own adventure story or creative writers looking to explore multiple plot lines. I haven't done too much with this site yet, but I did come up with a silly intro that would work really well for a children's story/ picture book.
I will continue to post more cool things as I find them. I hope you try out something new and have fun writing!
Sarah
1. When you can't figure out just the right word for your sentence, type elephant (or another word that will stand out) and carry on. After completing your piece or reaching a good stopping point, you can search through your document and find each elephant and replace with a more appropriate word. I am excited to try this in my own writing. It will save time and allow me to use the best descriptors possible.
2. If you have a serious procrastination problem and need a new form of motivation, check out Write or Die. This worked surprisingly well for me. I wrote about 350 word in a little over 5 minutes. I felt the same urgency to write as I do the night before a paper is due because I didn't want any of my work to be deleted. If you enjoy editing, but have troubles writing something in the first place, this might be the perfect tool for you!
3. This site seems especially cool for kids who want to craft an interactive choose your own adventure story or creative writers looking to explore multiple plot lines. I haven't done too much with this site yet, but I did come up with a silly intro that would work really well for a children's story/ picture book.
I will continue to post more cool things as I find them. I hope you try out something new and have fun writing!
Sarah
Thursday, October 3, 2013
Scarf 101 (Crochet)
I finally started work on a scarf. Over the past few months, I
have mastered crocheted potholders and dishtowels but have been
hesitant to graduate to scarves. Through ravelry (an online community for knitters and crocheters) I found the easiest pattern possible and have begun my preparations for fall!

This scarf is a little different because you chain
stitch the length of the scarf and add on rows to create width instead
of the other way around where you build on length. For some reason I
found this concept less frightening. Another plus about this pattern is
you really don't have to count/measure stitches. I made an incredibly
long chain stitch and began counting to see if I had reached my 120
stitch mark. When I got to 40, I said screw it. I carefully examined my
strand of yarn and decided it was scarf length, so I turned it around
and began single crocheting in each stitch. In this pattern you can
build on tassels/fringe while you crochet, but I decided to add those at
the end. I am taking the most lackadaisical approach to this scarf as
possible to trick my brain into completing this project. Follow-through
is my biggest craft obstacle to overcome, but I am working at it. :)
Here is my progress so far:


 |
| I love these colors, and this yarn is so soft. |
Here is my progress so far:

Tuesday, September 24, 2013
Crayon Art

I think it's safe to say that any Pinterest user who has checked out the craft boards has seen Crayola canvas art at one point of another. And while the rainbow of streaming wax down the canvas does look pretty awesome, this approach allows for more a little more creativity and you can use your crayons again! And if you mess up, you can easily cover that section with another color.
What you'll need:
-hairdryer
-box of crayons
-canvas paper
-some newspaper

What to do:
1. First, cover your work station with newspaper for easy cleanup. Melted wax is pretty easy to clean off a table. It is probably not as easy to get out of carpet, so be careful where you point that hairdryer!
2. Next, select the colors you would like to use. They can blend together or contrast; it is all up to you! I went with a "water" theme.
3. Lay out your canvas paper and set your crayons nearby. You are ready to begin. This canvas paper cost $3-4 at Hobby Lobby for 10 pages. If you mess up, you can easily tear out another page and start again. It will take a little bit of practice to see how your hairdryer moves the melted wax, so start low to the page at a slightly tilted angle (using low speed). I think it is the straight on approach that causes the splatter effect.
What works best is unwrapping part of your crayon, placing the tip of it on the canvas paper and pointing the hairdryer at that end. When it starts to melt move the tip of your crayon around creating a small puddle of melted wax. Then use the hairdryer to blow that across the page. When you get into your grove, you can make several puddles at once all over the canvas to speed things along and minimize the time you spend holding onto a hot crayon.
4. Have fun! This is such a neat project, and everyone's work turns out differently. The canvas paper is also easy to frame and can make some interesting abstract art if your walls are in need of accent pieces. Experiment and see just what your crayons can do!

~Sarah
Subscribe to:
Posts (Atom)